3D Print Stringing: 7 Fixes That Actually Work
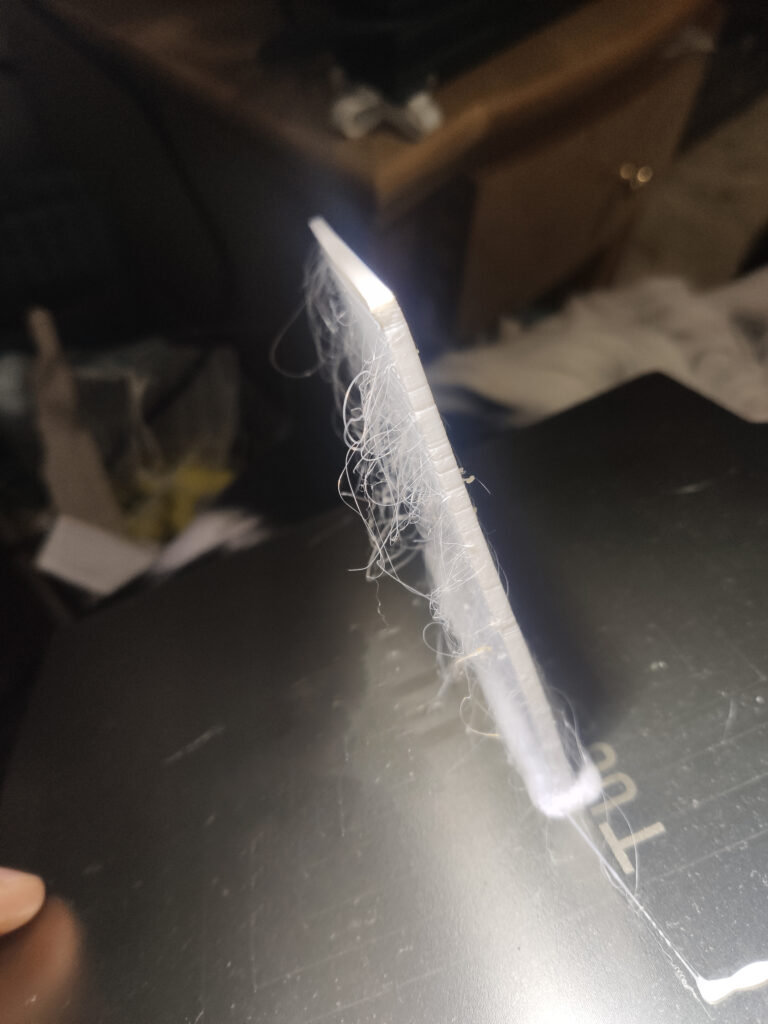
The first time I dealt with real stringing, I was printing a batch of small brackets on my old Ender 3, using a roll of no-name PLA I’d picked up cheap. I pulled the print off the bed and it looked like it had been dragged through a spider’s web — thin plastic hairs connecting every single piece. I spent an entire weekend changing random settings before I figured out it was two things stacked on top of each other: I had the nozzle running at 220°C “just to be safe,” and my retraction was still at the slicer’s factory default, which wasn’t tuned for my Bowden setup at all.
I’ve been printing for over 5 years now across Creality, Bambu Lab, and resin machines, and stringing is one of those problems that seems mysterious right up until you understand what’s actually happening at the nozzle. Here’s what I’ve learned fixing it — on my own printers, not from a manual.
What Causes Stringing?
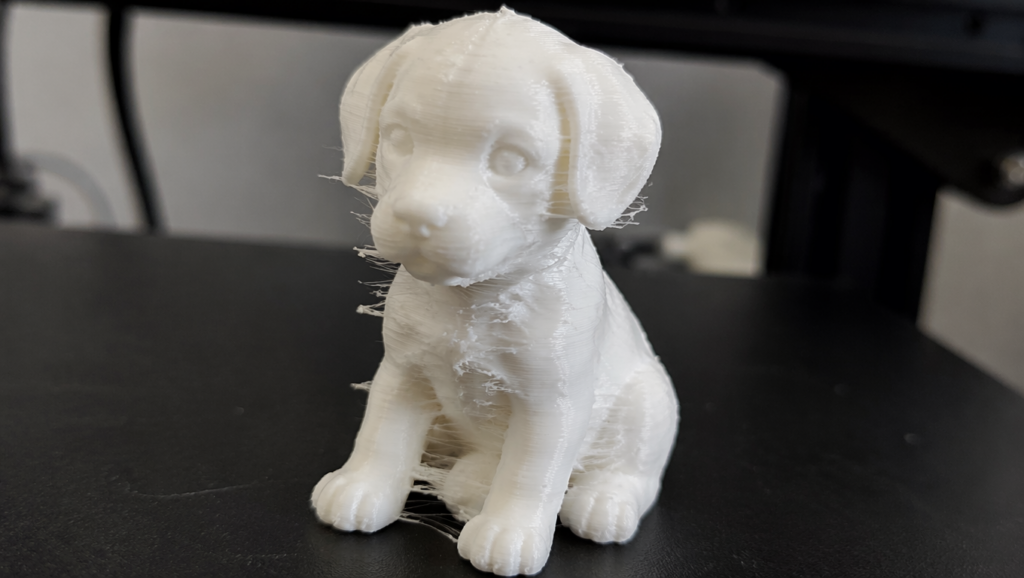
Stringing happens when melted filament oozes out of the nozzle while it travels between two points where it’s not supposed to be printing. Instead of staying put, a bit of plastic leaks out and stretches into a thin string as the nozzle moves.
The root causes are almost always one of these:
- Nozzle temperature too high
- Retraction settings not tuned
- Travel speed too slow
- Moisture in the filament
- Poor quality or old filament
Fix #1: Lower Your Nozzle Temperature
This is the first thing I check now, because it was the first mistake I made. Too much heat means the plastic is more liquid than it needs to be, and it drips more easily on every travel move.
On that same Ender 3, dropping from 220°C down to 200°C for a generic PLA cut the stringing on my brackets by more than half on its own — before I’d even touched retraction. Try lowering your temperature in 5°C increments and print a temperature tower to find the sweet spot. For PLA, most filaments print well between 190-210°C. If you’re printing hotter than 210°C for PLA “just to be safe,” that’s very likely your problem — it was mine.
Fix #2: Tune Your Retraction Settings
Once I’d fixed the temperature, there was still a bit of stringing left on the taller brackets — that’s when I went digging into retraction. Retraction pulls the filament back into the nozzle slightly before a travel move, reducing ooze. Two settings matter here:
Retraction distance: how far the filament pulls back. Bowden setups typically need 4-7mm, direct drive setups need much less, often 0.5-2mm. My Ender 3 is Bowden, and I ended up at 6mm — the factory default of 5mm was close, but not quite enough for the PLA I was using.
Retraction speed: how fast that pull happens. Somewhere between 25-45mm/s is a common starting range, but this varies by printer.
If you’re not sure which type of extruder you have, direct drive means the motor sits right on top of the hotend. Bowden means there’s a tube connecting a separate motor to the hotend.
Fix #3: Increase Travel Speed
A faster travel move means less time for plastic to ooze out before the nozzle gets where it’s going. My slicer had travel speed set to 80mm/s by default — bumping it to 150mm/s made a small but noticeable difference on the same set of brackets. Most slicers default to a reasonably fast travel speed already, but if yours is set low (under 100mm/s), this is worth checking.
Fix #4: Dry Your Filament
This one surprised me the most. I had a spool of PETG that had been sitting open on a shelf for months in a fairly humid room, and it wasn’t just stringing — it was popping and hissing at the nozzle too. PLA, and especially PETG and nylon, absorb moisture from the air.
If your filament has been sitting open for months, or you live somewhere humid, try drying it. A filament dryer box works well, or an oven on its lowest setting (check it doesn’t exceed your filament’s glass transition temperature) for a few hours can help in a pinch. That PETG spool went from unusable to printing clean after about 4 hours in a dryer box.
Fix #5: Enable Combing / Avoid Crossing Perimeters
Most slicers have a setting often called “combing” or “avoid crossing perimeters.” This keeps travel moves inside the print instead of crossing open air over already-printed areas, which hides any minor oozing inside the model instead of leaving visible strings on the outside. This is one of those settings I turned on once and never thought about again — it just works quietly in the background.
Fix #6: Reduce Printing Temperature for the First Layer Separately
Some slicers let you set a different temperature for the first layer versus the rest of the print. If you’ve raised your first layer temp for better bed adhesion (I run mine a few degrees hotter for exactly this reason), remember that doesn’t mean the rest of the print needs to be that hot too. It’s an easy setting to forget about once you’ve tuned it for adhesion.
Fix #7: Check Your Filament Quality
Budget or very old filament can have inconsistent diameter or fillers that behave unpredictably at the nozzle. After I’d fixed temperature, retraction, and travel speed on that no-name PLA, there was still a faint bit of stringing left that I couldn’t tune away. I switched to a different brand for the next batch of brackets, same settings, and it printed clean. If you’ve tried everything else and you’re still fighting stringing, it might genuinely be the spool.
Quick Checklist
- Lower nozzle temp in 5°C steps
- Tune retraction distance and speed for your extruder type
- Increase travel speed if it’s under 100mm/s
- Dry your filament if it’s been exposed to air
- Enable combing/avoid crossing perimeters in your slicer
- Separate first-layer temp from the rest of the print
- Try a different filament spool as a last test
Stringing is rarely one single cause — in my case it was three things stacked together (temperature, retraction, and a cheap spool). Start with temperature and retraction, since those solve the majority of cases, then work down the list if the problem persists.